Project Publishing(Azure)
The project to be published on Azure is selected from the Solution Explorer window and right-clicked.

Click the Publish.. button.

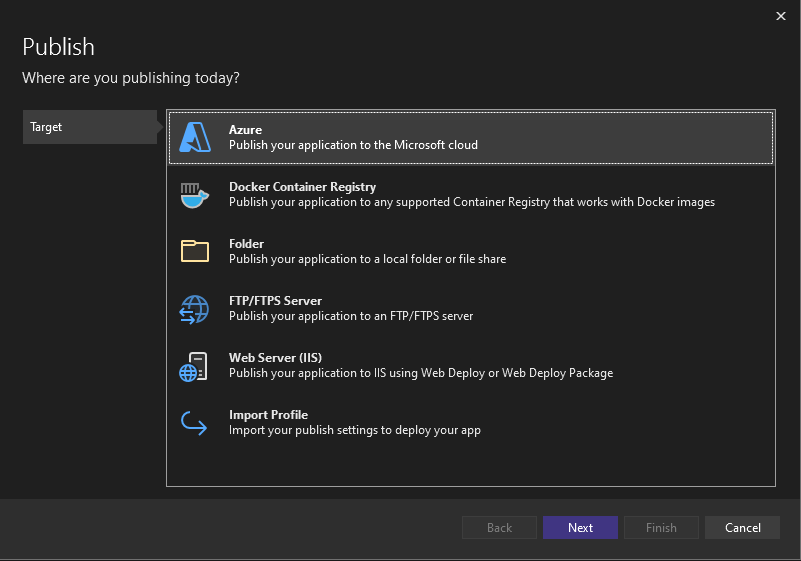
Azure is selected as the Target and the Next button is clicked.
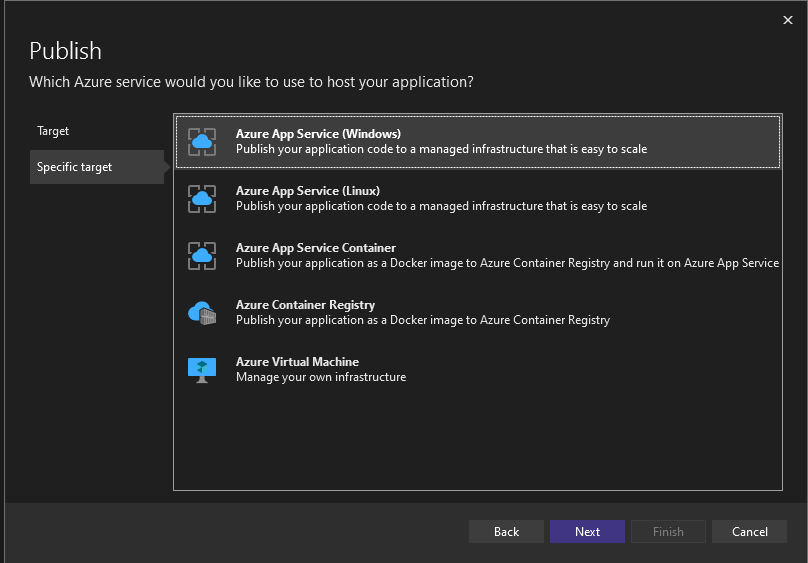
An appropriate option is selected as Specific Target and the Next button is clicked. In this example, Windows has been selected.
Azure account is required to create App Service. If you don't have an Azure account, create one.

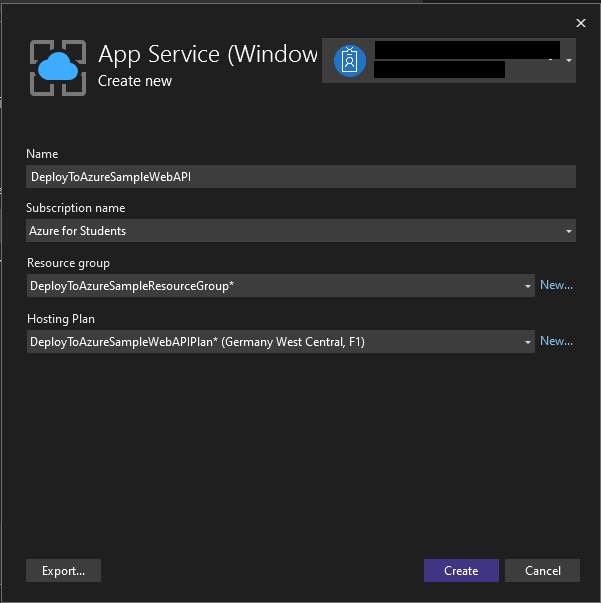
Click the green + button to create an App Service.

On the page that opens, 4 fields must be filled. The App Service name is determined from the Name field. Subscription type is selected from the Subscription name field. A resource group is created by clicking the New... button for the Resource group field. For the Hosting Plan field, a hosting plan is created by clicking the New.. button. After all fields are filled, the Create button is clicked.
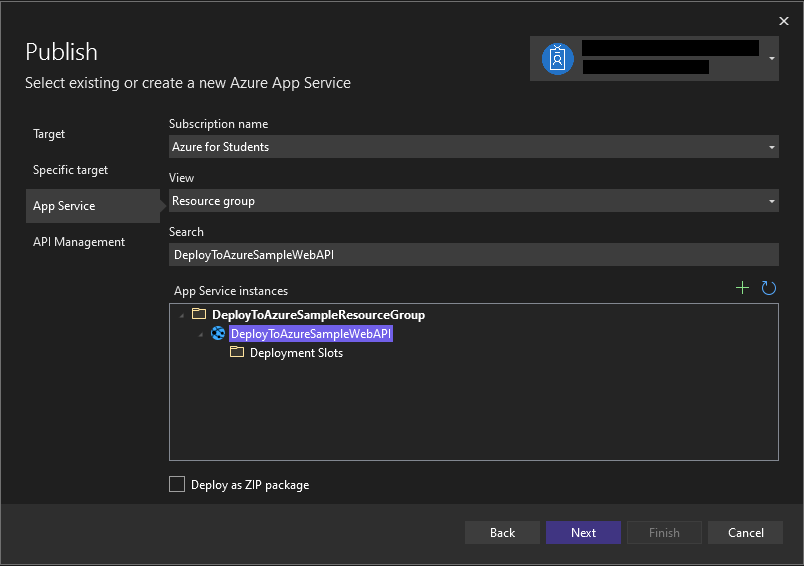
After selecting the App Service you have created, click the Next button.
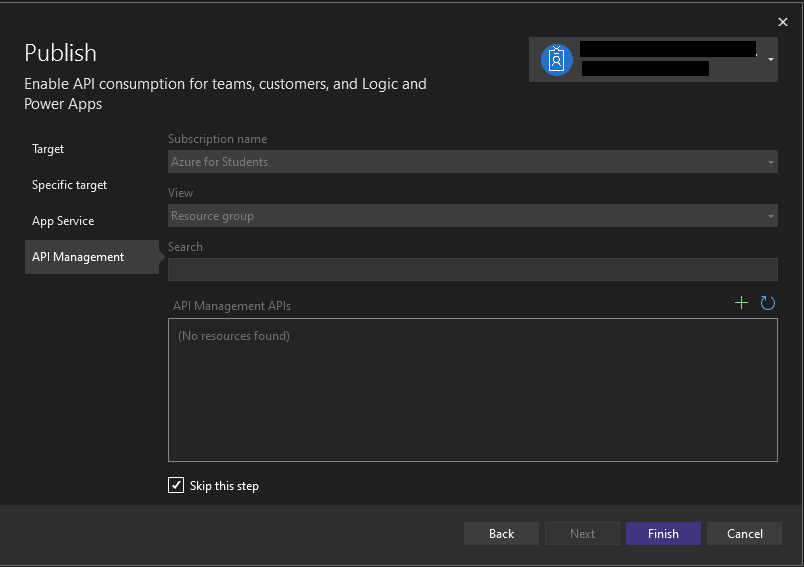
If API Management, which is an API management platform, is desired, the green + button is clicked and created. Since it will not be used in this example, the Skip this step option is selected and the Finish button is clicked.
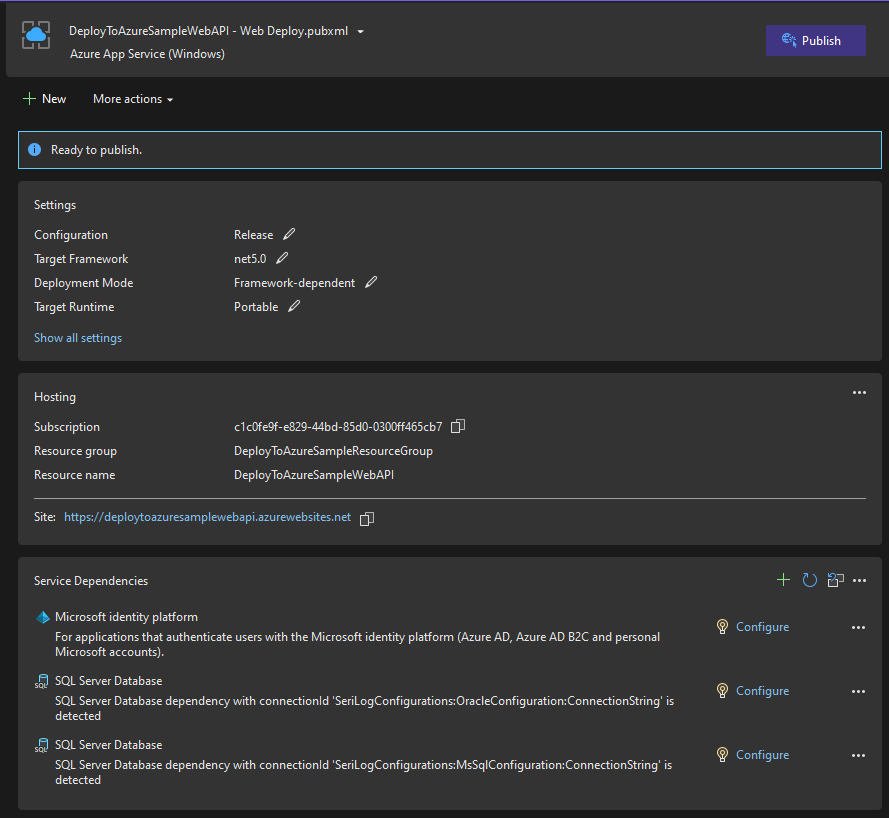
If Ready to publish text appears on the publish screen, the Publish button is clicked.
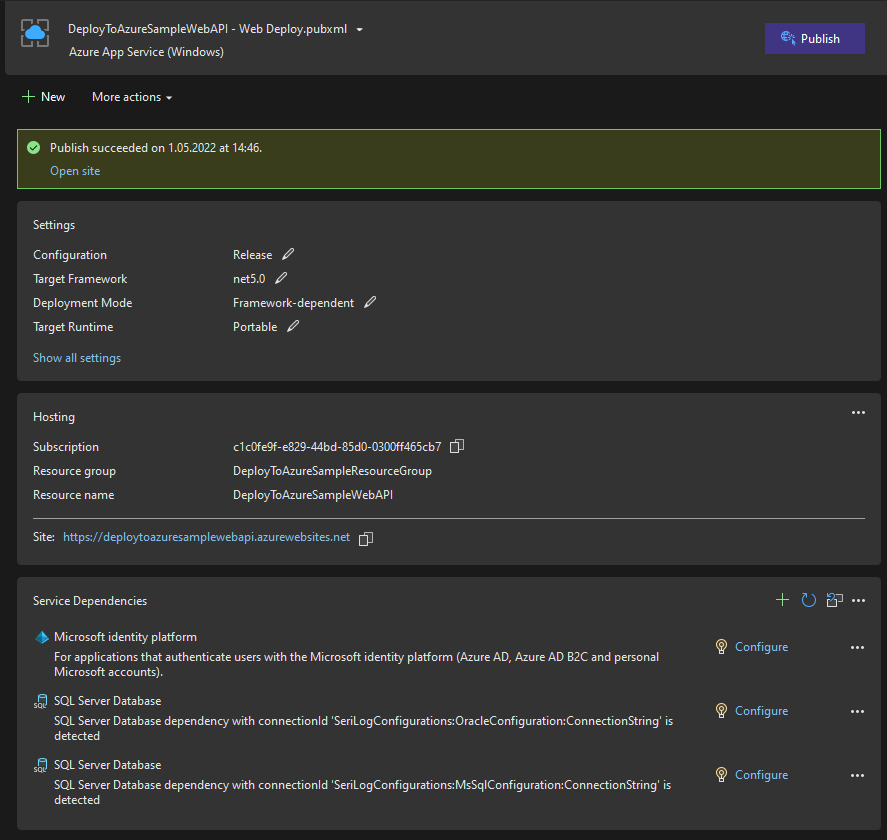
After publishing, you can go to your site by clicking the Open site link (the page will not be found because it is an API).
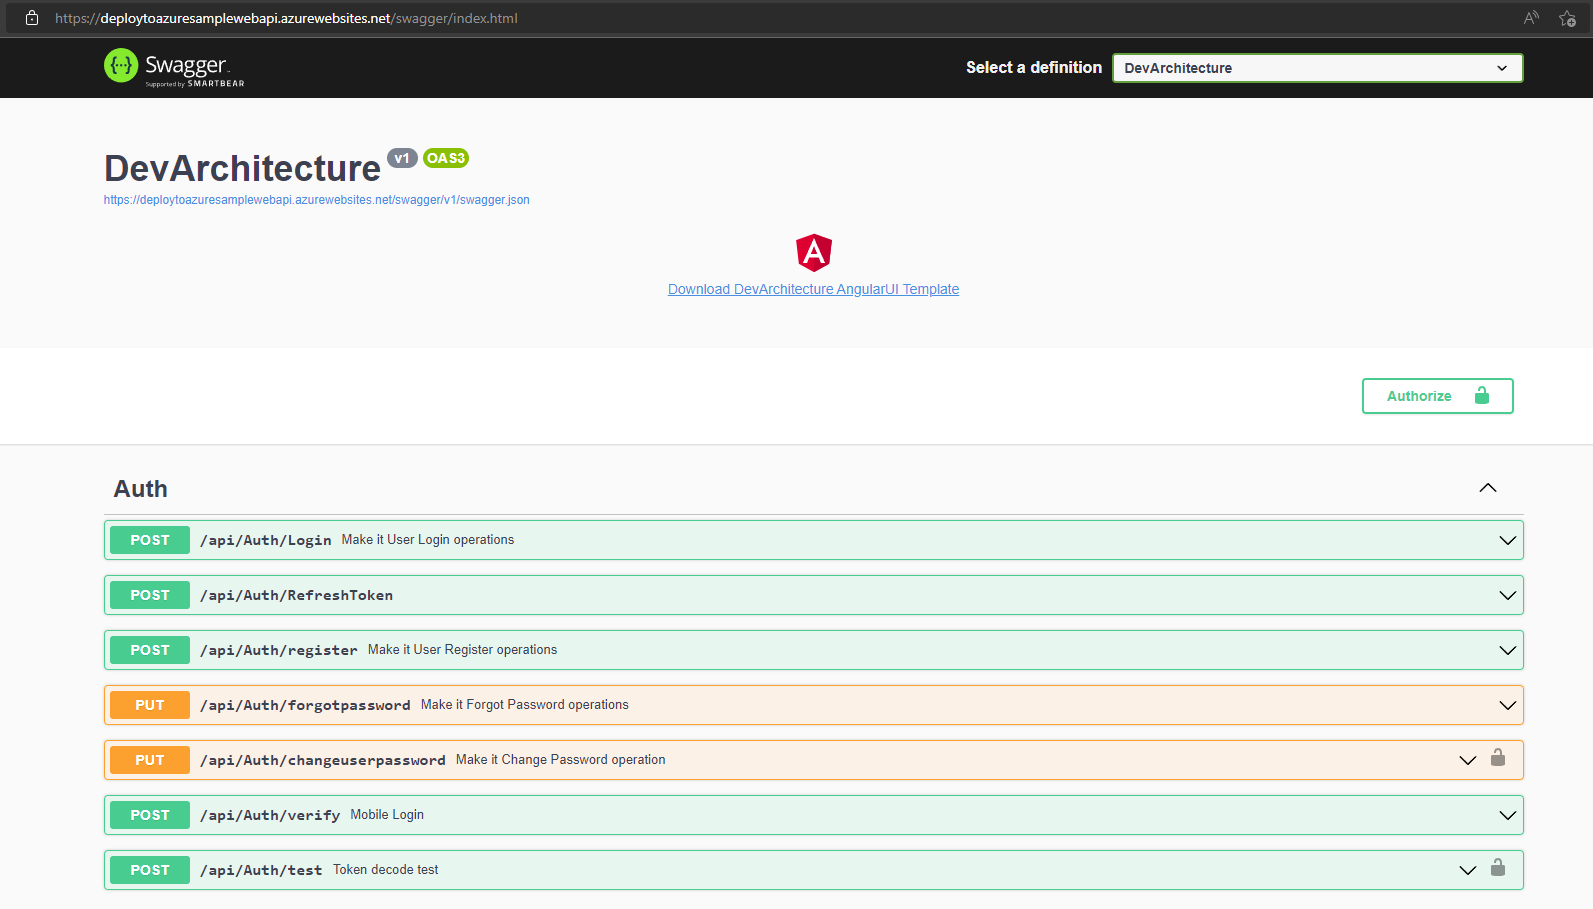
To test the running version of your application on Swagger, you can go to http{s}://<<FIELD_NAME>>/swagger/index.html with the help of your browser's address bar.
author: Veli GÖRGÜLÜ